Pages

Thursday, April 17, 2014

Special Needs: Van Gogh Sunflowers


Art Skills and Objectives:
- Learn about Van Gogh and his paintings of Sunflowers
- Identify the components that make up the sunflower
- Understand how to use mixed media in personal artwork
- Utilize tactile strategies, essential for students with visual impairment


Tuesday, April 15, 2014

Middle School: Color Streak Self Portrait


Art Learning Objective:
Value
Color Harmony
Grid Method
Proportions
Art Skill:
Expand understanding of: Value, color, Harmony, 2- Dimensional Artwork.
Grid Method to enlarge photograph
Positive and negative space

 
What I taught:
The uses of the grid method in Mathematics and Visual art
Scaling the grid and photograph
Reinforcing the importance of positive and negative space
Effective use of color and value with emphasis on analogous colors and adding harmonious color to an artwork that is mostly composed of pencil. 

Tuesday, November 5, 2013

All Ages: Botany and Tree Activity Prints


The block prints were such a hit last summer that I had to bring it back again!

This time I had the students design a botany scene or symbolism for an outdoor event held at the Tree. The George School tree is basically the school mascot. Tree is a time set aside everyday after lunch for all groups to meet for announcements, activities, and fore exciting cheer and events.  

I cut circles from the tops and bottoms of togo boxes to serve as the "stamp" that students were to design.  When you draw into one of these porous squares, it pushes down from the pressure and creates a low relief stamp. Once students were happy with their stamp, they were sent over to an inking station where they would use ink rollers on their stamp and make 2 prints. Students would be printing using one of two selected green block printing ink. One print was donated to make up the collaborative print, the second they could keep. Large prints were created is small groups to form bonds between the international students from the ESL Horizons Camp and regular campers. It was a fantastic communication and cultural learning experience for all of the kids.


Friday, November 1, 2013

10-14 Year Olds: Ceramic Pinch Pot Cupcakes

This summer I was blessed with access to work with clay and 2 firing sessions! Hooray!

The director selected the older girl groups to try out working with clay, and what a success it was- I can't wait to include clay working with all ages next year!

After I took a poll with a few clay-working projects, the vast majority of girls wanted to make cupcakes!

We started by using a silicone molds for the bottom of the cupcakes to get the zigzag textured effect. I sprayed them lightly with WD-40 so the clay wouldn't stick. Students started by making a small pinch pot on the table and transferring them to the molds until desired shape was achieved.

The next step was to make a second pinch pot for the top of the cup cake. This one was made by hand without a mold, we put a coil along the inside of the top pinch pot to keep it from sliding off the base pinch pot once fired. Students decorated the top of the cup cake with different shapes like cherries and sprinkles before the firing.

Once the pieces were fired, we painted them with acrylic paint and allowed to dry. We finished them off  Modge-Podge to make them shine. They looked fantastic!


All Ages: World Cup T Shirts

Every summer during camp, the kids are ecstatic for our camp-wide World Cup to begin!

Now if you are unfamiliar with what the World Cup is about, it's an international soccer tournament held each year with every team competing for the title. At the beginning of camp each team of campers, with the help of their counselor, choose a country that their team is representing. They compete against similar age leveled teams with the title being announced at the end.   

As the art teacher, I've taken over the responsibility to help each group execute their uniform/T-shirt design in the best possible way! In terms of media used, teams have chosen to use tye-dye, puffy paint and fabric spray paint. Below you will see a little bit of the process, as well as the form I created to help with the material purchases. 

A finished ITALIA shirt! 


Sunday, September 30, 2012

All Ages: Favorite Memory Prints

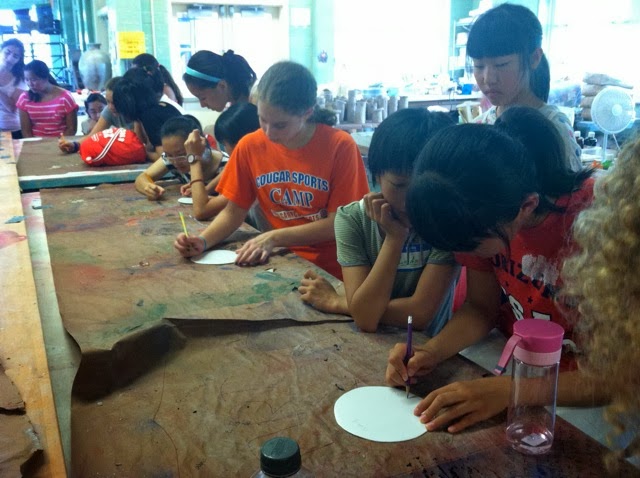
I began the lesson by having students think of their favorite memory at George School Day camp, for some this could be their first year, for many they start at 6 years old and stay until they are 14 years old. These kids grow through this camp as children and many become camp counselors once they are 15 years old.

Once students had their favorite memory in mind, they were to share with the class if they like. There are many fun activities and events that happen at George School Day Camp, which provides a variety of different favorite memories to see!

I showed a blue print that I created of what the final outcome would be; with all of the prints displayed together; and why we are only printing in the colors: Orange, Blue, and Red. GSDC stands for George School Day Camp.

I explained the process of printmaking to the older campers, while most of them have experience with it in art at school. It was a new technique for the younger children so I explained that we were making our very own "stamp".

I cut 3x3 inch squares from the tops and bottoms of togo boxes. When you draw into one of these porous squares, it pushes down from the pressure and creates a low relief stamp. Once students were happy with their stamp, they were sent over to an inking station where they would use ink rollers on their stamp and make 2 prints. One print was donated to make up the collaborative print, the second they could keep. Some students made many prints, and even additional stamps!


All Ages: Monochromatic Self Portrait Rainbow!

On 6x6 sheets of paper, I had the kids draw themselves the way they would like. I talked about what makes up a self portrait, and what monochromatic means. Monochromatic was a new word to all of the children. "How can you draw a picture of yourself with only using greens?" They were about to find out.

I gave each child a mirror that they could use to help draw their self portraits, I assigned 6 colors to groups of kids in each class. In 6 different bins, there were different shades of one color, the mediums consisted of crayons, thin markers, thick markers, and colored pencils. There was a large variety of colors for the children to use.

Once the portraits were completed, I hung them up for display for all the camp to see. The amount of positive feedback was rewarding. A long time employee even took a video of the Self Portraits at the end of the camp (some of the images started to curl from the heat, but it still looked wonderful!)

Click to watch video of the Monochromatic Self Portraits!

The older boys group working on their self portraits.


The final outcome hanging in the school gym. Wow!